How to Install Java and Use Maven
If you want to build Java projects efficiently, you’ll need two essential tools: Java (JDK) and Maven. Java lets you write and run programs, while Maven helps you manage dependencies and build your project automatically.
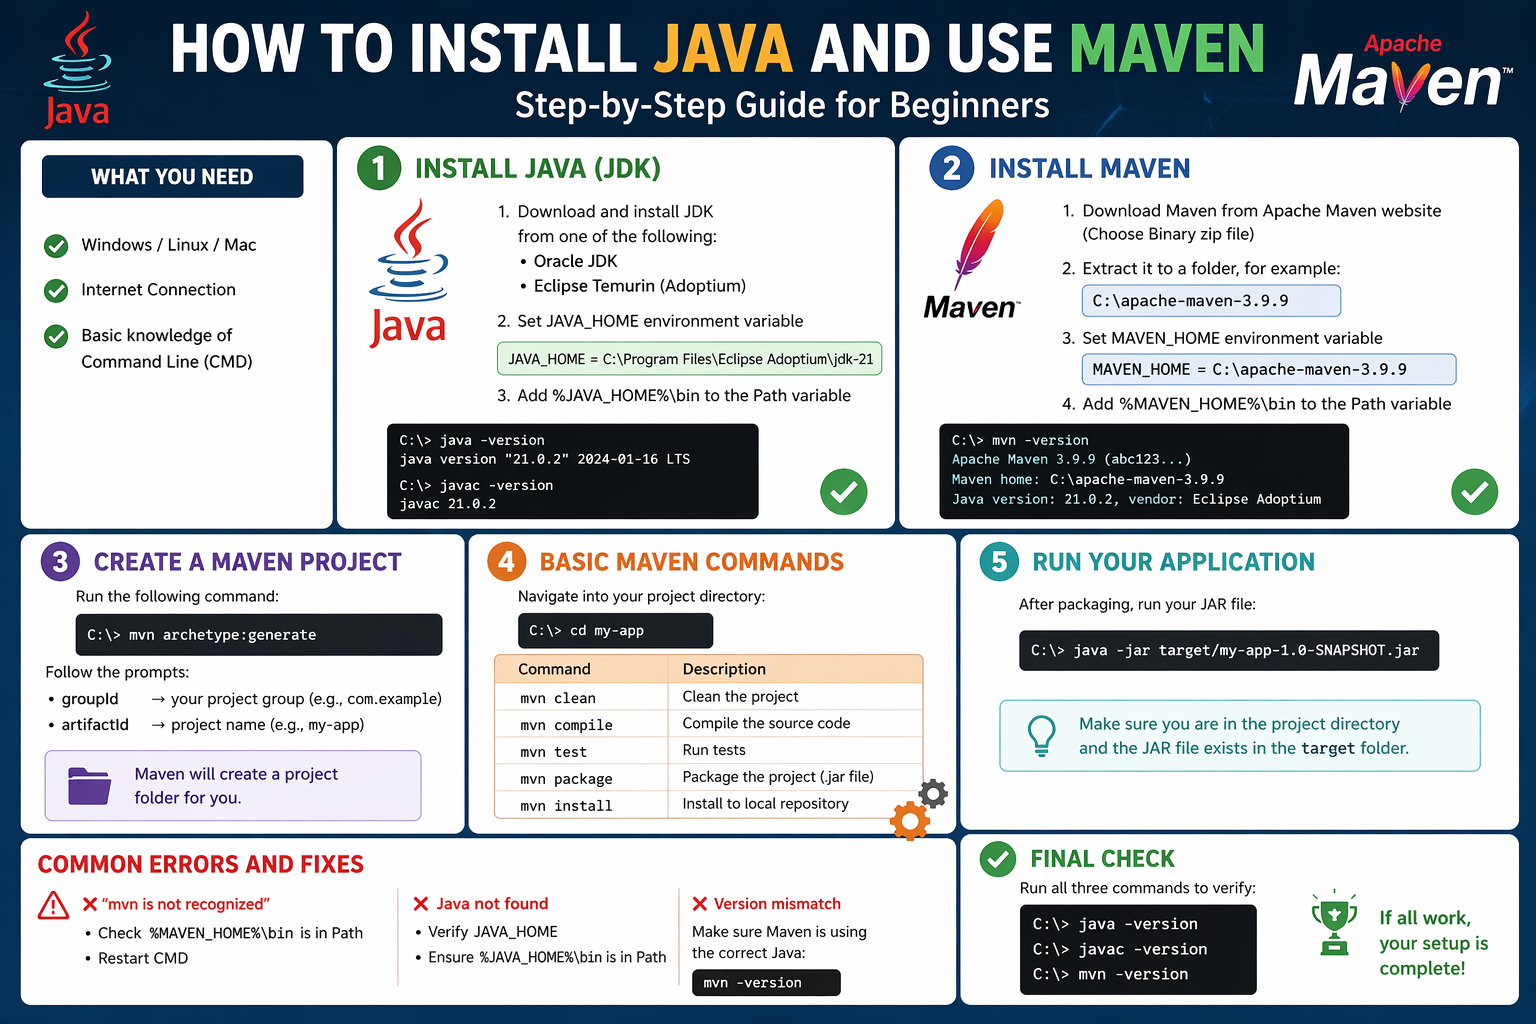
This guide walks you through installing both and using Maven from the command line.
What You Need Before Starting
- A Windows PC (steps are similar for Linux/Mac)
- Internet connection
- Basic familiarity with Command Prompt (CMD)
Step 1: Install Java (JDK)
To run Maven, Java must already be installed.
Download Java
You can install:
- Oracle JDK
- Eclipse Temurin (recommended, free)
Install and Set Environment Variable
After installing:
- Open Start Menu and search Environment Variables
- Click Edit the system environment variables
- Click Environment Variables
Under System Variables:
- Click New
- Name:
JAVA_HOME - Value (example):
C:\Program Files\Eclipse Adoptium\jdk-21
Now edit the Path variable and add:
%JAVA_HOME%\bin
Verify Installation
Open CMD and run:
java -version
javac -version
If both commands show versions, Java is installed correctly.
Step 2: Install Maven
Download Maven
Download Apache Maven and choose the Binary zip file, then extract it, for example:
C:\apache-maven-3.9.9
Set Maven Environment Variables
Go back to Environment Variables.
Under System Variables:
- Click New
- Name:
MAVEN_HOME
- Value:
C:\apache-maven-3.9.9
Edit Path and add:
%MAVEN_HOME%\bin
Verify Maven Installation
Open a new CMD window and run:
mvn -version
You should see Maven version along with Java details.
Step 3: Create a Maven Project
Run this command:
mvn archetype:generate
Follow the prompts:
groupId→ your project group (for example,com.example)artifactId→ project name (for example,my-app)
Maven will create a project folder for you.
Step 4: Basic Maven Commands
Navigate into your project:
cd my-app
Now you can use these common commands:
Clean Project
mvn clean
Compile Code
mvn compile
Run Tests
mvn test
Package Project (Creates .jar File)
mvn package
Install to Local Repository
mvn install
Step 5: Run Your Application
After packaging, run your JAR file:
java -jar target/my-app-1.0-SNAPSHOT.jar
Common Errors and Fixes
❌ “mvn is not recognized”
Fix:
- Check
%MAVEN_HOME%\binis inPath - Restart CMD
❌ Java not found
Fix:
- Verify
JAVA_HOME - Ensure
%JAVA_HOME%\binis inPath
❌ Version mismatch
Make sure Maven is using the correct Java:
mvn -version
Final Check
Run all three commands:
java -version
javac -version
mvn -version
If all work, your setup is complete.
Conclusion
With Java and Maven installed, you now have a powerful setup to build, manage, and run Java projects efficiently. Maven saves time by handling dependencies and automating builds, making it a must-have tool for developers.